How to Set Up a Planted Aquarium: Step-by-Step for a Tank That Thrives
Disclosure: PawCritic is reader-supported. A couple of links below are Amazon affiliate links, and we may earn a small commission if you purchase through them at no extra cost to you.
My first planted tank looked great for exactly eleven days. Then the Java fern melted into brown sludge, the algae moved in like it owned the place, and my wife started calling the aquarium "the swamp." I'd done what most beginners do: bought plants, shoved them in gravel, and hoped. Hope is not a fertilizer.
Here's what I know now, after six tanks and more plant rescues than I can count: a planted aquarium isn't harder than a fish-only tank. It's just different, and it rewards getting the basics right in order. Light, soil, nutrients, patience. Miss one and the whole system falls over.
So let's build one properly, step by step. This is the setup process I use on every planted tank now, and it works whether you're doing a 5-gallon desktop nano or a 40-gallon showpiece.
Step 1: Decide What Kind of Planted Tank You Want
Before you buy anything, pick your level. This decision determines every other purchase, and skipping it is how people end up with a high-tech setup they don't want to maintain.
Low-tech (my recommendation for 90% of beginners): Easy plants — Java fern, Anubias, crypts, Amazon sword, floating plants — with standard lighting and no CO2 injection. Growth is slower, maintenance is weekly, and the failure rate is low. You can absolutely grow a beautiful tank this way. The key is choosing plants that don't demand more than the tank offers.
High-tech: Pressurized CO2, strong lights, nutrient dosing, carpet plants like Monte Carlo or dwarf baby tears. Stunning results, but it's a hobby within a hobby — daily attention, expensive gear, and algae problems that appear overnight if the balance slips. I run one high-tech tank and it's the one that causes 90% of my aquarium stress.
Be honest about your time and patience. If you travel for work or just want a relaxing tank, low-tech is the answer. You can always upgrade later.
Step 2: Get the Substrate Right
This is the step most beginners get wrong, and it's the hardest to fix after the tank is running. Standard aquarium gravel is inert — it holds plants in place but feeds them nothing. Root-feeding plants like swords and crypts need nutrients in the substrate, not just in the water column.
Your options, in order of what I'd actually do:
- Nutrient-rich planted substrate (like Fluval Stratum or ADA Aqua Soil) — the gold standard. These are clay-based soils that buffer pH slightly soft and hold nutrients for roots. This is what I use in every planted tank now. It costs more, but it's the difference between swords that grow and swords that sulk.
- Inert gravel or sand + root tabs — a budget approach that works if you push fertilizer tablets under the plants every couple of months. More fiddly, but fine for heavy root feeders.
- Plain gravel with only epiphyte plants — if you stick to Java fern, Anubias, and other plants that attach to wood and rock instead of rooting in substrate, plain gravel is fine. These plants take nutrients from the water column.
Depth matters too: about 2-3 inches (5-8 cm) of substrate for root feeders. And if you're layering — nutrient soil under a cap of sand or gravel — keep the layers separated or they'll mix into a muddy mess over time. My earlier guide on gravel vs sand substrates covers the physics of what sits under your plants in more detail.
Step 3: Light — the Single Biggest Factor
More planted tanks fail from bad lighting than any other cause. Too weak and plants slowly starve, which looks like "my plants are dying for no reason." Too strong and algae explodes. The right answer is a light that matches your plants' needs — and a timer, because plants need a consistent photoperiod.
For low-tech setups: aim for roughly 20-40 lumens per liter of tank volume, on a 6-8 hour photoperiod. That's enough for easy plants without pushing into algae territory. Most modern LED aquarium lights have adjustable brightness and built-in timers — use both.
For high-tech: you're in the 40-70+ lumens per liter range, usually with RGB tuning, and the CO2 has to keep pace with the light. If you crank the light without CO2, you get algae. Period.
Here's the practical rule I give everyone: start your photoperiod at 6 hours and only extend it if plants are growing well and algae stays away. And keep the light on a consistent schedule — plants don't care if it's on at 2pm or 8pm, but they do care that it's the same time every day. A timer takes the discipline out of your hands, which is where it belongs.
Step 4: Do You Need CO2? (Probably Not — Yet)
The CO2 question sends more beginners down a rabbit hole than anything else. Here's the honest answer: for a low-tech tank with easy plants, you don't need injected CO2. At all.
Easy plants — Anubias, Java fern, crypts, most stem plants like water wisteria and hornwort — grow acceptably without it. They're slower, sure, but they grow, and the tank stays stable.
CO2 becomes necessary when you want demanding plants: carpets, red plants that stay red, fast-growing stems in dense arrangements. Without CO2 those plants either grow leggy and pale or just die slowly. If that's the look you want, budget for a proper CO2 system — and learn the rest of the high-tech dance (dosing, water changes, light tuning) at the same time, because they're a package deal.
Liquid "carbon" supplements are a middle ground that helps a little but isn't the same as injected CO2. Fine for low-tech tweaking, not a substitute.
Step 5: Plant Before You Add Fish — and Do It Right
This is the order that saves the most heartbreak: plants first, water second, fish way later. Planting into a tank without fish is infinitely easier — no fish to stress, no water to drain, no fish to catch while you rearrange.
Planting basics that people get wrong:
- Don't bury the rhizome. Java fern, Anubias, and Bolbitis have a thick horizontal stem called a rhizome. Bury it and it rots. Attach these plants to wood or rock with super glue gel or fishing line instead.
- Stem plants go in bunches. A single stem looks sad and grows thin. Plant 5-8 stems together for a bushy look.
- Root feeders get pushed in properly. Swords and crypts want their roots buried, crown above the substrate line.
- Rinse everything. Potted plants arrive in rock wool and often with snails or hitchhikers. Rinse the roots, remove the wool, and inspect for snail eggs.
- Soak driftwood first. New wood leaches tannins — tea-colored water. Not harmful, but it'll tint your water for weeks unless you pre-soak or boil it. Some people like the blackwater look; if you don't, pre-soak for a week.
And yes, you can have too many plants. Overcrowding hides fish, blocks light to lower leaves (which then melt), and makes maintenance a nightmare. Leave swimming room and leave gaps between plant groups.
Step 6: Cycle the Tank With Plants in It
Here's the thing most guides get backwards: plants and fish don't arrive together. The nitrogen cycle — the process that grows the bacteria that turn fish waste into less-toxic compounds — takes 4-8 weeks, and it happens whether or not plants are present. Plants help by absorbing some ammonia and nitrates directly, but they don't replace the cycle. According to the Merck Veterinary Manual, ammonia is highly toxic to fish even at low concentrations — which is why cycling before adding fish isn't a suggestion, it's the difference between a healthy tank and a slow-motion emergency.
The process: set up the tank, plant it, fill it, and add an ammonia source (pure ammonia or a pinch of fish food). Then test every few days until ammonia and nitrite read zero and nitrate appears. That's your cycle complete.
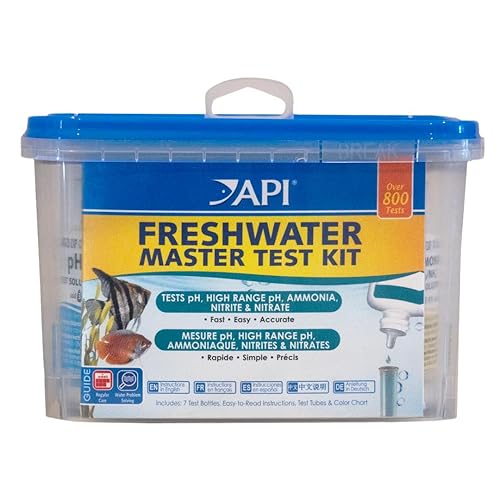
You'll want a reliable test kit for this — the API Freshwater Master Test Kit is the standard for a reason: it covers pH, ammonia, nitrite, and nitrate, and it lasts for hundreds of tests. The strips are easier but less accurate and run out fast; the liquid kit is the one I keep on every tank I own. If you're new to cycling, my nitrogen cycle guide walks through the whole process in detail.
Patience is the whole game here. The tank that's been running for two months with no fish is the tank that won't kill your first fish. The tank that gets fish on day three is a gamble with living creatures.
Step 7: Add Fish Slowly, and Choose Plant-Friendly Fish
Once the cycle is done, the fun part — but resist the urge to fill the tank in one trip. Add fish in small groups, a week or two apart, so the bacteria colony grows with the bioload. Overstocking is the #1 cause of new-tank crashes.
Some fish are also just bad news for planted tanks. Goldfish will uproot and eat almost anything (and they need cool water that most plants hate). Silver dollars and some cichlids are plant destroyers. Even some community fish — like certain barbs — nibble soft-leaved plants. If you want a planted tank that stays planted, choose plant-safe community fish: tetras, rasboras, corydoras, otocinclus, cherry shrimp, dwarf gouramis, and the like.
Bottom line on stocking: fewer fish, planted tank, happy ecosystem. This is the one area where restraint pays off visibly — a lightly stocked planted tank is the most stable tank you can own.
Step 8: The Maintenance Routine That Keeps It Alive
A planted tank is never "done." But the routine is genuinely small — maybe 30-45 minutes a week once it's stable.
Weekly:
- Water change of 20-30%. This is non-negotiable — it removes accumulated waste and replenishes minerals plants use up.
- Trim stem plants. Fast growers will try to take over; cutting them back keeps the light reaching everything.
- Remove dead or yellowing leaves. They decay and feed algae.
- Wipe the glass. Algae on the front pane is the signal to check your photoperiod and nutrients.
- Test water if something looks off — not on autopilot, but when plants or fish look unhappy.
Monthly:
- Prune harder: thin out crowded areas, replant healthy trimmings.
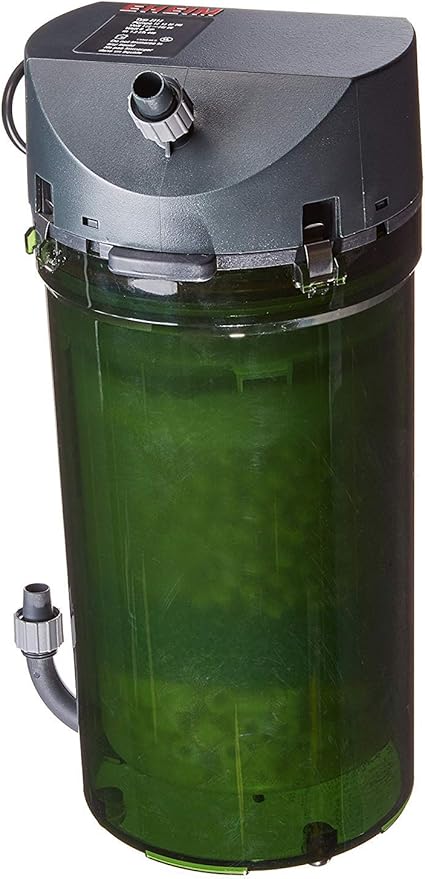
- Clean the filter — gently. Rinse media in dechlorinated water (or old tank water) rather than tap, so you don't nuke the bacteria.
- Add root tabs near root feeders if you're on inert substrate.
- Fertilize the water column if you have epiphytes or stem plants — a comprehensive liquid fertilizer at half the recommended dose is a safe starting point.
The mistake I made early on was reacting to algae with more cleaning and longer light hours. That's backwards. Algae is almost always a balance problem — too much light, too many nutrients, or too few water changes — and fixing the balance beats scrubbing. Research on aquaponic systems, published in journals like Aquacultural Engineering, consistently shows aquatic plants pulling nitrogenous waste straight out of the water column — which is part of why a well-planted tank is inherently more stable than a bare one. If you want the full picture on what goes wrong and how to fix it, our aquarium disease and water-quality guide covers the water-chemistry side of keeping everything healthy.
Plants That Won't Let You Down (and One That Will)
If you want a shortlist of plants that survive beginners:
- Anubias — nearly indestructible, grows in almost any light, attach it to wood or rock.
- Java fern — same story; the "it's still alive after I forgot about it for a month" plant.
- Cryptocoryne — hardy root feeders; they'll melt dramatically when first added (scary but normal) and then regrow.
- Amazon sword — big, forgiving, wants root tabs.
- Hornwort or water wisteria — fast-growing stem plants that soak up excess nutrients and help fight algae.
- Floating plants (frogbit, salvinia) — great nutrient sponges; just thin them weekly or they'll block all the light.
And the one to avoid as a beginner: dwarf baby tears (Hemianthus callitrichoides). It's the poster plant of high-tech aquascaping and it will absolutely die in a low-tech tank. Every time I see a beginner post "why is my carpet plant brown," it's this plant. If you want a carpet look without CO2, try dwarf sagittaria or Marsilea instead.
The Two Products I Actually Recommend
I've tested a lot of gear over the years, and two things earn a permanent spot in my planted-tank kit. First is the API Freshwater Master Test Kit — already mentioned, but it belongs on this list: testing is the only way to know what your tank actually needs, and this kit is the accurate, affordable standard. Second is a dechlorinator/water conditioner — every water change needs one, and a quality conditioner also detoxifies heavy metals. Neither is glamorous. Both prevent the two most common disasters: crashing a cycle and shocking fish with chlorinated tap water.
A Realistic Timeline
Here's what the first three months actually look like, so you know what's normal:
- Weeks 1-2: Setup, planting, cycling. Plants may melt a little — crypts especially. That's normal; they're acclimating. Water may look hazy. No fish.
- Weeks 3-6: Cycle finishes (test to confirm). Plants start visibly growing. Algae may make a first appearance — manage light hours, don't panic-scrub.
- Weeks 6-8: First fish, in small groups. Plant growth accelerates as the tank matures.
- Months 2-3: The tank hits its stride. Trimming becomes regular. This is when planted tanks start looking like the photos.
Most people give up in weeks 3-6, during the ugly phase. Don't. The ugly phase is the tank working — bacteria colonizing, plants rooting, algae being outcompeted. Every established planted tank on the internet went through it.
The Takeaway
Set up a planted tank and you're not just keeping fish — you're running a small ecosystem. The light feeds the plants, the plants clean the water, the fish fertilize the plants, and your weekly water change keeps the whole loop balanced.
The formula, once more, in one breath: match the plants to your lighting budget, put nutrients under the root feeders, plant before you add fish, cycle with patience, stock lightly, and keep a weekly 20-30% water change religiously. Do that and the "swamp" phase passes, the algae backs off, and one morning you'll catch yourself staring at the tank for ten minutes straight — the way I did, right before my wife started calling that one "the jungle" instead.
Related reading: How to Cycle an Aquarium, Gravel vs Sand Substrate, How Often to Change Aquarium Water, Common Aquarium Fish Diseases, and Best Aquarium LED Lighting.